Tag Archives: planning

Plotting with Aeon Timeline 2

One of the rewards for nanowrimo this year is a discount off Aeon Timeline. But what use is Aeon Timeline to a novel writer?


I made extensive use of it this year to plan my novel, so here is a basic guide on how I used it. Click on any image to see it larger.

timeline-example

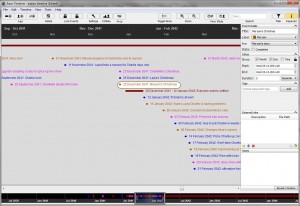
This is a partial view of my completed timeline. You can see the buttons along the top, then the timeline itself, and then events at the corresponding mark on the timeline. Because my novel is set during a school year, it was important to work out term dates and to know what day of the year events took place on.


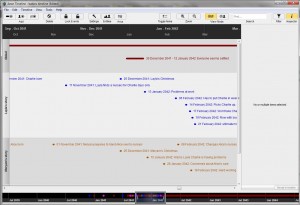
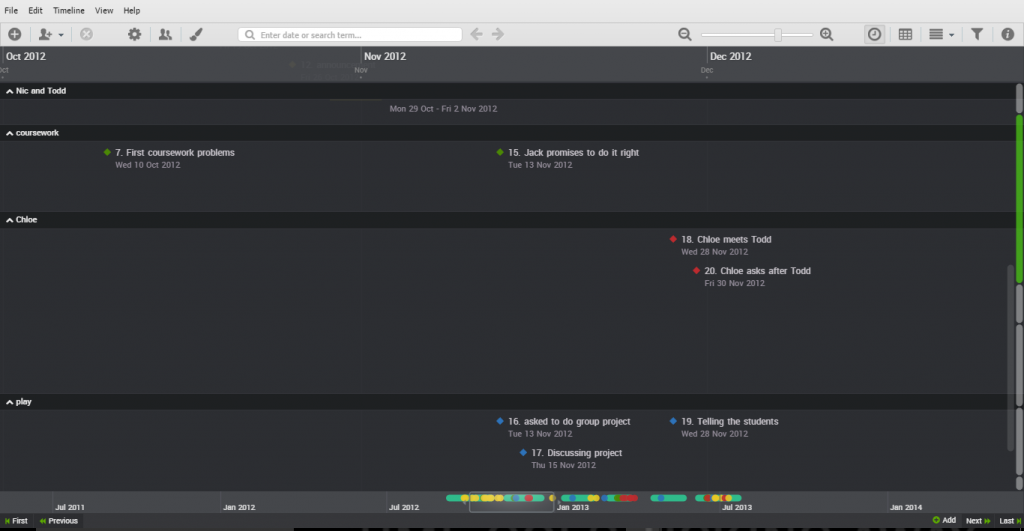
This view shows the story events separated into different arcs.


At the bottom of the window is a timeline graphic, with a sliding bar representing the part that’s visible, and the coloured blobs representing the events. This provides an overview of the spread of your events. I used colour coding for the different arcs involved.
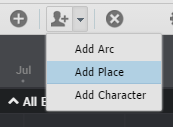
 

add-arcAs well as events, you can add entities to your story – arcs, places or characters, within the fiction template. Arcs help you to keep the different elements straight, while places and characters help you keep track of who’s doing what and where. If you set a birthdate for characters, you can keep track of their ages at different events. This is a feature I didn’t need this time, but relied on a great deal last year.
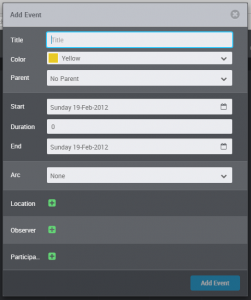


add-eventAdding events to the timeline is easy. Either double click on the timeline, or use the Add event button. The double click method pre-fills the date where you clicked, but you can adjust this at any time.


Fill in the information about your event – at the minimum, you need a title and a date. Choose a colour to represent your event – use colour coding to help you see related events.


Add all the events you need for your story. For each event, you can assign an arc, location, and observers/participants.


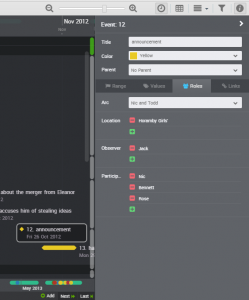
info-bar


This is an example of an event with several of the boxes filled in.


Clicking on any event on the timeline opens up the event details for you to tweak as necessary.


Tabs provide places to put notes for the scene, such as what the weather is like, or add tags to the event. You can also nest events, but again this is a feature I haven’t used this year.


It’s straightforward to view a story with or without arcs. I used this to create the different story arcs separately, and then view without arcs to see how the different events were interwoven.


timeline-with-arc

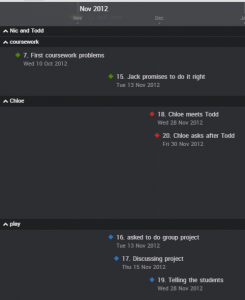
This shows the story events broken down into their separate arcs. This enabled me to check that each arc made sense and events happened in the right order.


If an event needs adjusting, you can either click on it and make amendments in the info pane or just drag the event along the timeline until you reach the right date – a tooltip showing the date makes this easy.
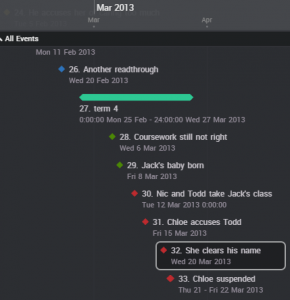


events-with-no-arcAnd this shows the story events interwoven – the coloured blobs indicate what arc they belong to. This enables me to see how the events affect each other, and make sure that there are no issues.


relationship-view

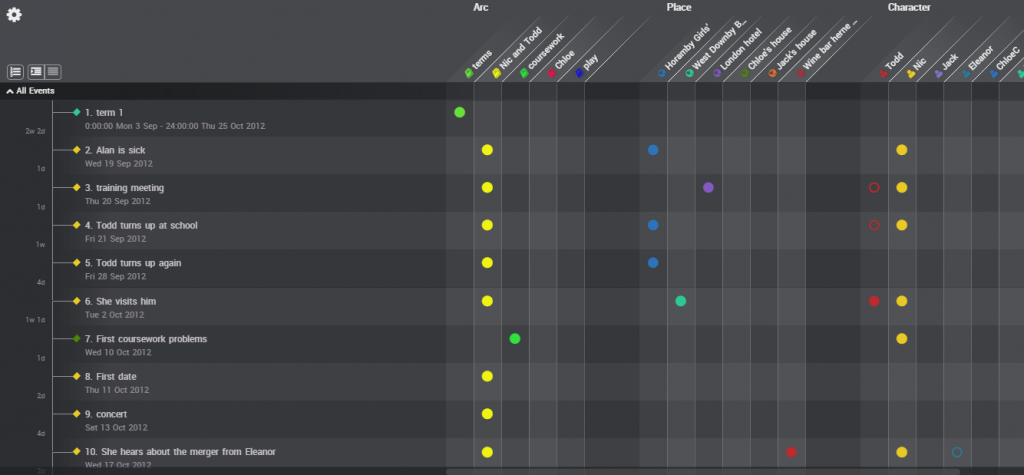
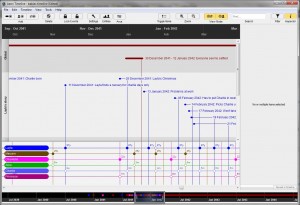
Another view that is useful is the relationship view – a grid indicating events in a list, with markers to show the entities involved. I then used this list to create scenes in Scrivener. All that was left was to actually write them up. I did go back and make changes to the timeline to reflect changes that happened in the novel, to ensure consistency between the two files, but generally the timeline represented the bulk of the planning I needed.


Aeon Timeline 2 will sync with Scrivener, but that’s a feature I haven’t explored yet. For now, the timeline itself is a useful enough tool even without that.


Aeon Timeline 2 also has templates for use with time management projects, legal projects and non-fiction projects – it’s incredibly useful, and the more I explore it, the more useful I find it.



Preparing for nanowrimo

It’s halfway through October, and all round the world, writers are preparing for the massive writing festival that is NaNoWriMo, or national novel writing month, the challenge that sees them aiming for a grand total of 50,000 words on a new project within the 30 days of November.


I have to confess that I’m one of them – each year for the past few years, I’ve bashed out a first draft of a novel during November, and then spent the rest of the year working on it. Each year, the draft I finish is a little more polished than the previous year, and I get a little further through editing. Eventually, my aim is to have several novels all nearing the finished product at around the same time, and then start publishing.


But how do you prepare for such a project? And should you be starting before 1st November anyway?


There are two types of writers, when it comes to nano – known as the planners and the pantsers. In fact, these are just two ends of the spectrum, and most people sit some way along the route between. Planners will plan out their story in great detail, world building, character building, plotting out their story. J.K. Rowling has released sheets showing how she planned out the Harry Potter stories in detail. Pantsers will fly by the seat of their pants, starting with a basic idea (or even less than that), and just seeing how it develops. Stephen King is a great proponent of that approach.


This is where I find Scrivener comes in handy: I’ll work out the rough outline of my story, often dividing it into three parts, corresponding to the three act structure. I’ll budget out the words for each part, and create sections for each scene I think needs to happen. The index cards hold a rough summary of the action for that scene, and I plan on between 1000 and 2000 words per scene.


Then when I get to November, I aim to fill in at least one scene each day, providing a structured journey from beginning to end but with flexibility should the story develop in an unexpected way – if your characters don’t rebel at some point in your story and do something you hadn’t planned, then maybe they’re not real enough!


The important thing when tackling nanowrimo is to remember that the aim is to create a first draft of a novel. It is not to create a polished, well-written manuscript that’s ready to send off to agents and publishers. There’s lots of work still to do once that first draft is finished.


Nor should you be worried if the story doesn’t achieve all you hoped for it. That’s what the rest of the year is for. The aim is to bash through your story, become completely involved in it and figure out what works and what doesn’t. Once you’ve finished, you might be able to work with what you have, or it might mean pulling it apart completely and restructuring. Whichever level it’s at, you’ll have had 50k words’ worth of work put into it, and you’ll have a much better idea of what the story needs.


So enjoy your nano prep and enjoy your writing – just be prepared to keep working on it for the rest of the year!


Planning tools – storyplanner

storyplannerThere are many different approaches to planning a novel. Do you start with characters and a setting and see what happens? Do you plan out every detail thoroughly before starting? How do you structure the content?


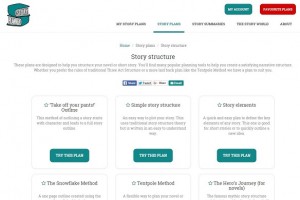
One tool that offers to help you with all that is www.storyplanner.com, a website where you can find a collection of different templates to complete online. There is a selection of plans to choose from, many well-known, such as the Snowflake method or the Three Act structure, as well as other, lesser known methods that are equally useful. Other sections on the website include facilities for developing your characters and your story world, and creating a summary or synopsis of your novel.


Plans can be created and then downloaded for further use, in Word, PDF or text format. A free membership allows you to create one story plan, which would need to be deleted in order to create a new one, while premium membership allows unlimited plans.


The variety of plans means that you are bound to find something that suits your method of working, and the advice that accompanies each plan will help you structure your thoughts and develop your ideas. Screenplay plans are included alongside those for novels and those applicable to either medium. The ability to favourite plans is an added bonus, as you start developing your planning skills. Links take you to further information on some of the plans.


I’m currently trying out this site for my own projects, and I’m finding it’s a useful way to keep my ideas together and organised. As it’s online, it also means that it’s accessible from just about anywhere. As a bonus, it also appears to be fully accessible from tablets, meaning that planning is easy to do while out and about, as long as you have internet access.


Writing books – Ready, Set, Novel

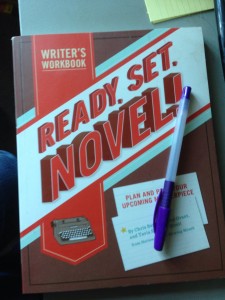
ready set novelWith Nanowrimo fast approaching, there are many writers out there preparing to spend the month of November writing a first draft of a novel. Ready, Set, Novel! is written by the organisers of Nanowrimo, Chris Baty, Lindsey Grant and Tavia Stewart-Streit, and promises to help you plan and plot your upcoming masterpiece.


While this book is more of a workbook than a reading book, the structure that it offers is very helpful if you’re new to planning for a full novel. From the very first steps of storming your brain, through characters and plot, to exploring setting and heading into the blank page, this book contains plenty of ideas and useful information to help you pass that tense month of October in a positive way and hit November ready to go.


Pages include family tree diagrams ready to fill in, places to freewrite about what you want to achieve, spaces for timelines, pages to consider the before and after of your main characters, suggestions for scenes, and a space to write out your schedule and deadlines.


If you’re used to planning for a novel and you already have a good idea of what to write, then this book would probably be too much for you, and you would struggle to fit your ideas into the areas and structure provided, but if you’re coming to nano for the first time, or are nervous about what to write or how to plan, then this book would be an ideal way to spend the time between now and November, when the fun really starts. And, of course, it can be used at any time of year, not just planning for National Novel Writing Month.


Writing tools 2 – Aeon Timeline

Further to my post on Scrivener, a tool growing in popularity with many writers, another tool that’s well worth a look at is Aeon Timeline.


Whether your novel spans decades or takes place over a few days, the chances are that you have a sequence of events to organise – how long does that journey take? what day of week did they meet up? was there really enough time between those events for that to take place? It can be a real headache trying to keep track of what happens when and where, and if you are trying to balance different story arcs the headaches are multiplied.


Aeon simple view

Aeon simple view with Inspector open

Aeon Timeline is very simple to use, while providing many tools that are useful for organising your planning.  The timeline across the top shows the date, the events are listed in order on the timeline and at the bottom a bar shows how the current view relates to the overall timeline. Colour coding can be used for different events, and they can be events for a single moment in time or longer events, recorded to within the degree of accuracy you need, whether this is to within the year, the month or even the second.


Clicking on any event on the timeline gives access to the details of that event – here you can record which story arc it belongs to, the time and duration of the event and any other details you need. You can also provide a link to an external file – in fact the mac versions of Scrivener and Aeon Timeline will link with each other, so you can generate a scrivener file from your timeline and keep the two synced. The windows update for this feature is currently in development, and will be made available as a free update when released.


Aeon timeline arc view

Aeon timeline arc view

Having linked each event to a story arc, it’s very simple to switch to arc view. Here each arc is separated out to aid planning. You can zoom into and out of the timeline easily to obtain an overview or to see details, either by using the zoom buttons or the CTRL key and scroll wheel, and scroll backwards and forwards along the timeline by dragging the handle at the bottom.


Aeon entity/arc view

Aeon entity/arc view

Another useful feature is entity view. This enables you to create entities – people or places for example – and link them with the events on the timeline. You can also create birth and death events for people, and once you have created a birth event, each event that you link with an entity will keep you informed as to their age – a very useful feature that also helps you avoid linking them to events outside their lifespan.


Each entity may be linked as an observer or a participant, enabling you to keep track of whose point of view the section is to be written in. Again, colour coding plays a large part in planning out your timeline.


It’s very easy to combine simple view, arc view and entity view in any combination, to see different parts of your project in detail and check the timeline is feasible. The reminder of day of the week and time of year is also useful – having given a season for one event, you can clearly see what point in the year other events happen.


To create a new event, you either click on the button to create your arc, entity or event, or double click in the right place on the timeline. Either way brings up a dialogue box for you to enter and adjust details. Events may be dragged along the timeline either singly or in groups. A simple filter system enables you to see all the events affecting a specific entity, or with a specific tag, arc or label.


Timeline creation options

Timeline creation options

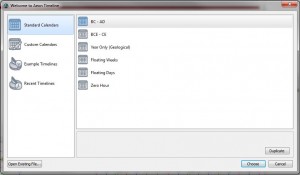
Options for creating a timeline include floating timeline, zero hour and geological. This should cover any project you could possibly conceive of!


I’ve been using Aeon Timeline for a while now, and find it very straightforward and useful. When they produce a Windows version that will sync with Scrivener, there’ll be no stopping me, but in the meantime the two programs even run separately provide me with every assistance I can think of.


Aeon Timeline is available as a free trial. It is, of course, useful for more than just fiction writing, and videos, forums and support are all available from the website. There are other features available, such as import/export and printing, but I feel I have covered the main features that, to me, make this an essential part of my writing toolkit.