Advantages of styles
Using styles is a handy way to help you ensure your formatting is consistent throughout your document. Styles can also help you to navigate through your file and see the structure easily, and if you intend to convert your Word file to ebook format, styles will enable you to generate an automatic table of contents.
Applying styles
The styles options appear on the Home ribbon. You will see several different styles listed, including Normal, Heading 1 and Heading 2. You may also have a Title style.

Each of these styles may be applied to your document by highlighting the text and then choosing the style you want.
It is important that you use the right style for the right section; it is less important what the style currently looks like, as it is easily modified.
Most of your document will be created in the Normal style, and you should use Heading 1 for chapter headings. Highlight the chapter name and then click on the style named Heading 1. If you have subheadings, you can use Heading 2, etc.
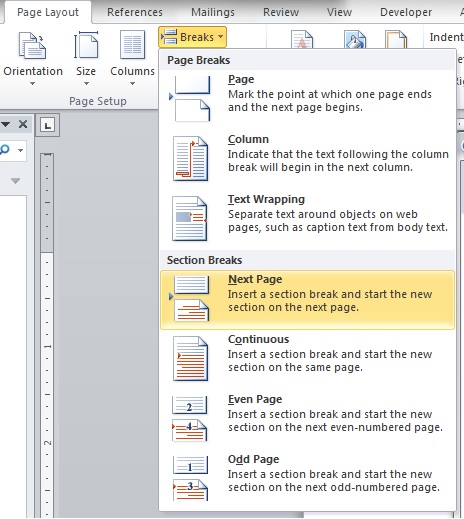
 At the end of the chapter, in order to make the next chapter start on a new page, use a Section Break (Next Page) or Section Break (Odd Page). Both are found on the Page Layout ribbon, under Breaks. Using Odd Page will ensure that the next section starts on the right-hand page of your book. All odd pages should be on the right-hand page – please note that the Word two-page preview does not always display this properly.
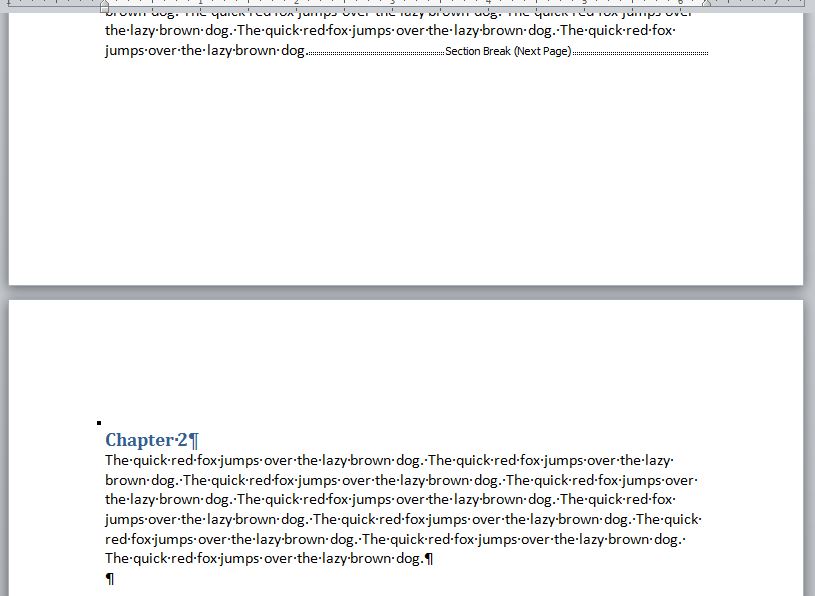
 Using the Show/Hide button (on the Home ribbon) to see the invisible characters will help you with your formatting. This button lets you see the characters that are normally invisible, but that control the layout of your document.
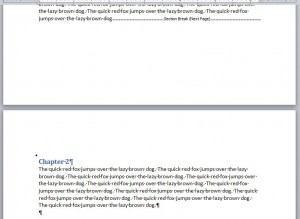
Here you can see:
- the section break used rather than leaving blank lines manually
- the chapter heading formatted using Heading 1
- the pilcrow mark used to show paragraph marks
- dots instead of spaces.
Modifying styles

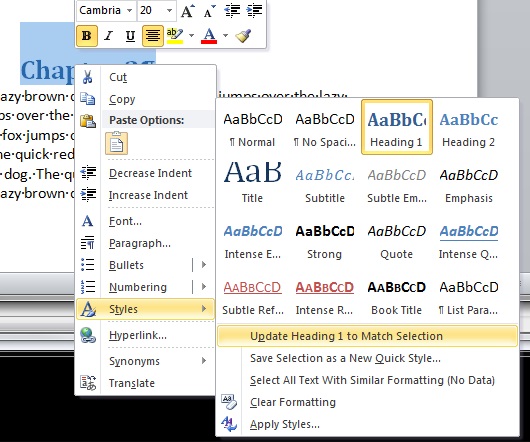
If you want to change the appearance of either of the styles used, choose one heading or one paragraph to change. When you have that one exactly as you want it, then highlight it, right-click and choose Styles/Update Heading 1 to Match Selection or Styles/Update Normal to Match Selection. This will automatically make your changes to every section of text where that style is applied.
More about modifying styles in my next post, on using paragraph formatting.
Using styles to navigate
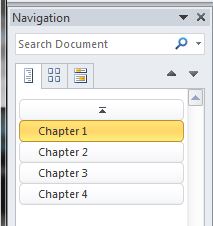
If you turn on the Navigation Pane (found under the View ribbon) you will see a list of the headings you have used. Clicking on these is a quick way to jump around your document, and if you have subheadings, for example in a non-fiction book, you can see the structure very clearly.
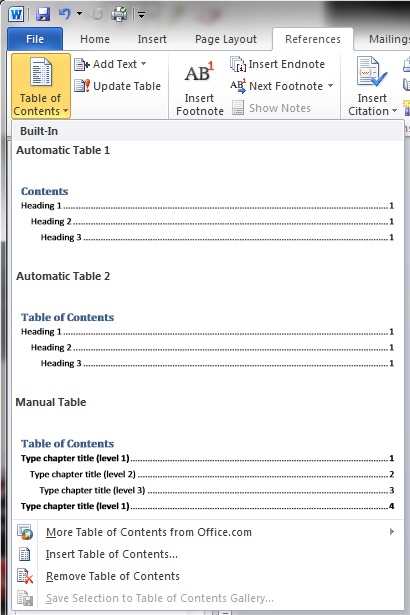
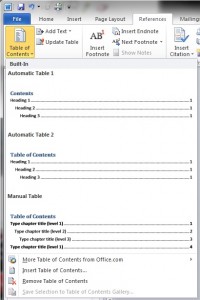 Moving to the top of your document and choosing Table of Contents on the Reference ribbon will give options for an automatic table of contents, with or without page numbers. These will be hyperlinked to each heading, so that Ctrl+clicking on a heading will take you to that point in the document, and this will translate to the ebook file as well. If you generate the Table of Contents before your text is finished, then you can right-click the generated table later and choose Update Field, choosing the option Update entire table, to ensure that the table is up to date. Alternatively, make the Table of Contents the last job you do when finished.

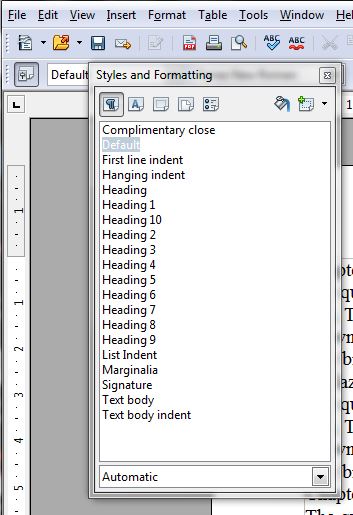 You will access the styles option in Open Office Writer by selecting Format/Styles and Formatting, or by clicking the Styles and Formatting button on the toolbar (on the left). Apply the style by highlighting text in your document and double-clicking the style you want.
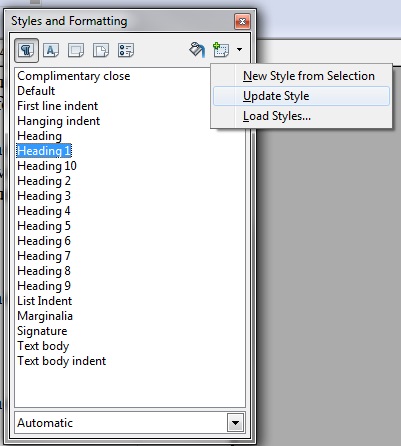 To modify a style, change one of the sections of text that uses it. Then, with that section highlighted, on the formatting window use the dropdown button to choose Update Style.
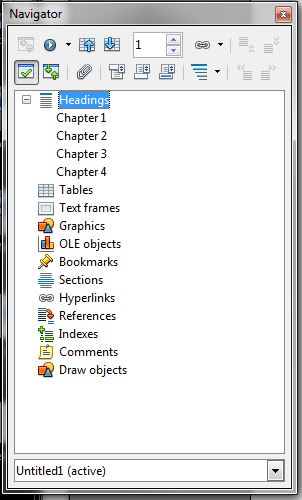 Use the Navigator pane, under View/Navigator, to move around the document and see the structure. Expand the heading section if necessary by clicking on the plus sign to its left.
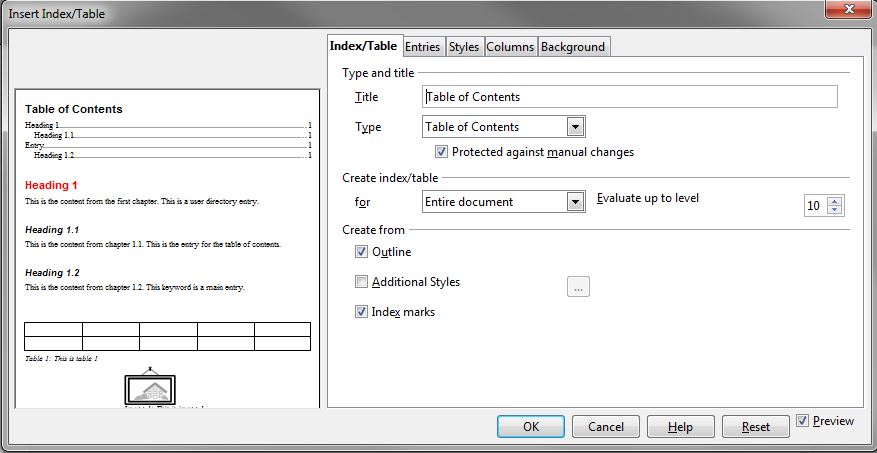 Use Insert/Indexes and Tables/Indexes and Tables to insert a table of contents.