One of the rewards for nanowrimo this year is a discount off Aeon Timeline. But what use is Aeon Timeline to a novel writer?
I made extensive use of it this year to plan my novel, so here is a basic guide on how I used it. Click on any image to see it larger.

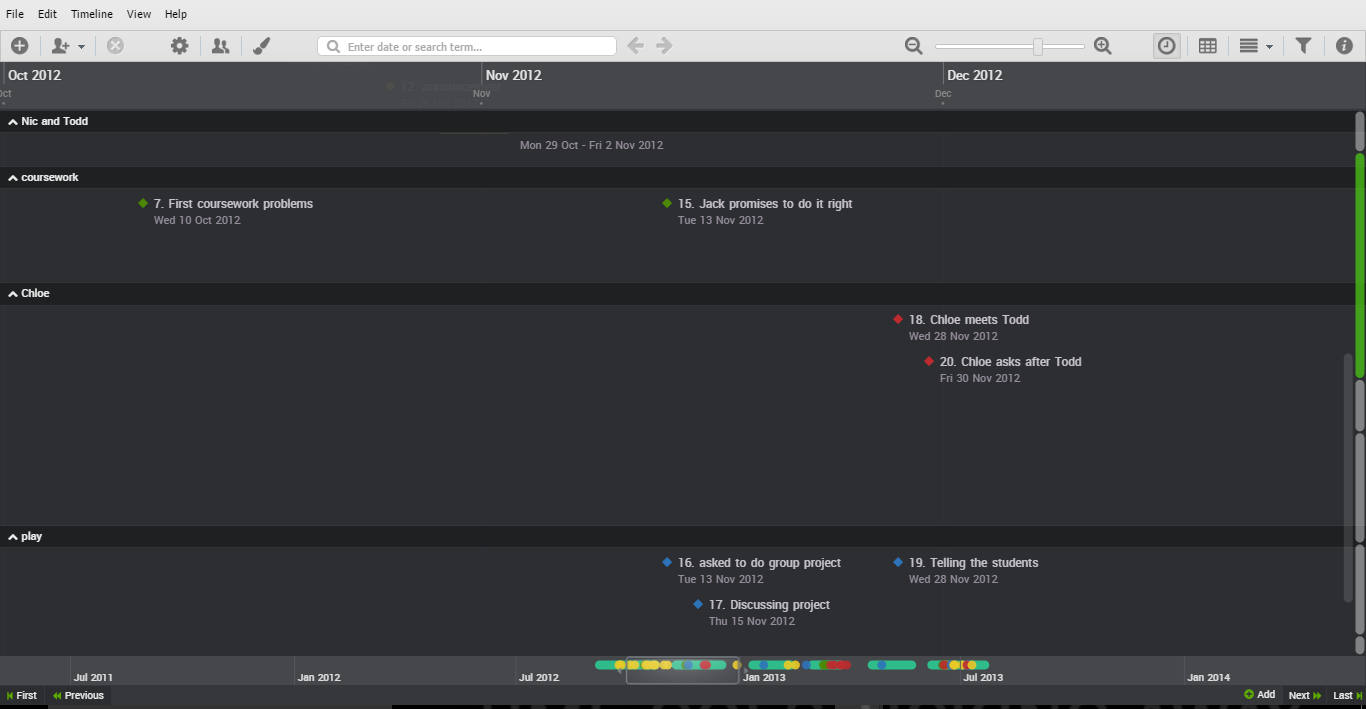
This is a partial view of my completed timeline. You can see the buttons along the top, then the timeline itself, and then events at the corresponding mark on the timeline. Because my novel is set during a school year, it was important to work out term dates and to know what day of the year events took place on.
This view shows the story events separated into different arcs.
At the bottom of the window is a timeline graphic, with a sliding bar representing the part that’s visible, and the coloured blobs representing the events. This provides an overview of the spread of your events. I used colour coding for the different arcs involved.
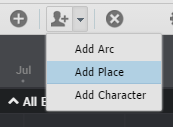 As well as events, you can add entities to your story – arcs, places or characters, within the fiction template. Arcs help you to keep the different elements straight, while places and characters help you keep track of who’s doing what and where. If you set a birthdate for characters, you can keep track of their ages at different events. This is a feature I didn’t need this time, but relied on a great deal last year.
 Adding events to the timeline is easy. Either double click on the timeline, or use the Add event button. The double click method pre-fills the date where you clicked, but you can adjust this at any time.
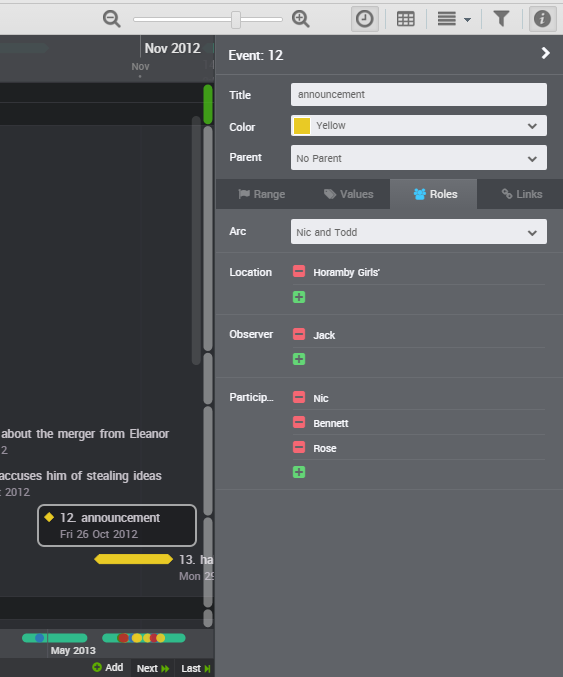
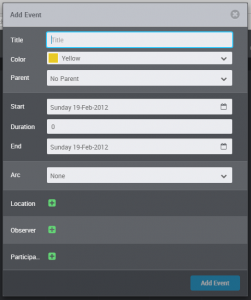
Fill in the information about your event – at the minimum, you need a title and a date. Choose a colour to represent your event – use colour coding to help you see related events.
Add all the events you need for your story. For each event, you can assign an arc, location, and observers/participants.
This is an example of an event with several of the boxes filled in.
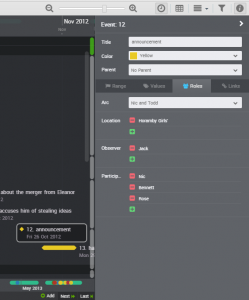
Clicking on any event on the timeline opens up the event details for you to tweak as necessary.
Tabs provide places to put notes for the scene, such as what the weather is like, or add tags to the event. You can also nest events, but again this is a feature I haven’t used this year.
It’s straightforward to view a story with or without arcs. I used this to create the different story arcs separately, and then view without arcs to see how the different events were interwoven.

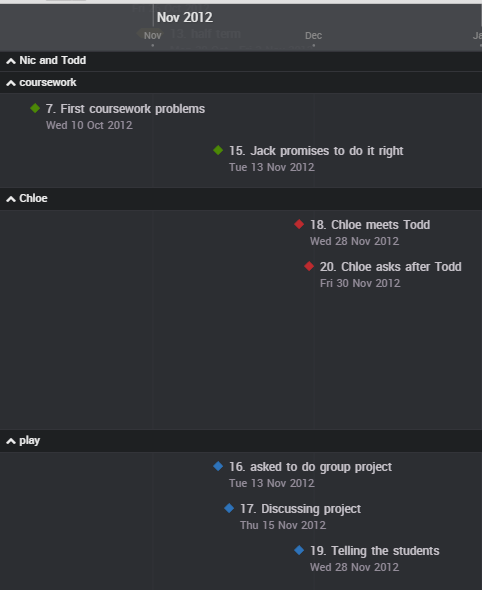
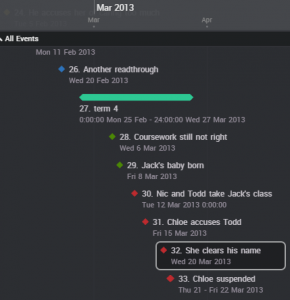
This shows the story events broken down into their separate arcs. This enabled me to check that each arc made sense and events happened in the right order.
If an event needs adjusting, you can either click on it and make amendments in the info pane or just drag the event along the timeline until you reach the right date – a tooltip showing the date makes this easy.
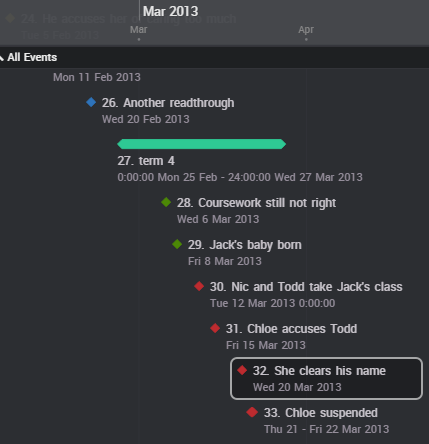
 And this shows the story events interwoven – the coloured blobs indicate what arc they belong to. This enables me to see how the events affect each other, and make sure that there are no issues.
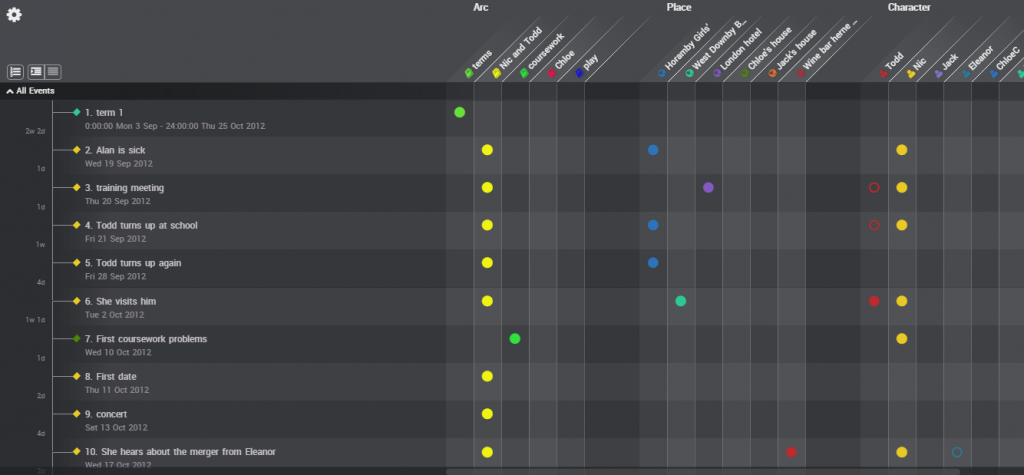
Another view that is useful is the relationship view – a grid indicating events in a list, with markers to show the entities involved. I then used this list to create scenes in Scrivener. All that was left was to actually write them up. I did go back and make changes to the timeline to reflect changes that happened in the novel, to ensure consistency between the two files, but generally the timeline represented the bulk of the planning I needed.
Aeon Timeline 2 will sync with Scrivener, but that’s a feature I haven’t explored yet. For now, the timeline itself is a useful enough tool even without that.
Aeon Timeline 2 also has templates for use with time management projects, legal projects and non-fiction projects – it’s incredibly useful, and the more I explore it, the more useful I find it.

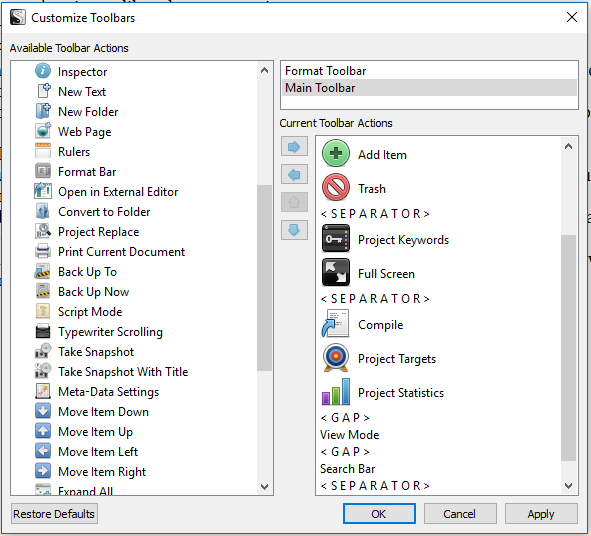 To add the project targets option to your toolbar, click on Tools>Customise toolbar.
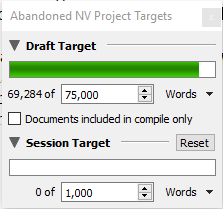 The project target window looks like this – set up your draft target for the total number of words you’re aiming for overall. Tick the box for documents included in compile only if you don’t want to include any project notes you add.
 There’s also a document target. Click on the little circle on the bottom right of the window, and you’ll get the option to set a target for that specific scene, or document.