I often get non-fiction projects to typeset for print, and I’m noticing a few typical problems, especially when those projects are not copy-edited. So here’s some tips to help you.
Plan your hierarchy of headings
Decide on your hierarchy of headings and plan your content accordingly. It can be easy to get carried away when writing, slapping in headings as you think they’re needed and putting some sort of formatting on them. But if you plan your work out by using the headings as a skeleton, it will be clear what should be a top level heading, what’s the next stage, what are just emphasised lines etc.
All headings should be hierarchical – no heading 3 under a heading 1 without a heading 2 between. This is now essential for proper ebook formatting, but good advice for print books as well. There may be content under the heading, or it might go straight to the next heading – that’s up to you.
- Heading 1
- Heading 2
- Heading 3
- Heading 2
- Heading 1
- Heading 2
- Heading 2
- Heading 2
- Heading 3
- Heading 2
This will also lead to a clear structure of information in your book, which will help your reader to find the information they need.
Use styles for your headings
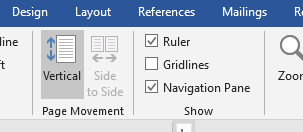
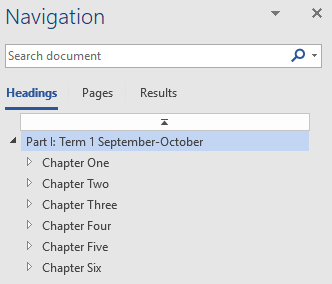
The Styles function in Word will show you the structure of your work in the Navigation Pane (View/Navigation Pane). This also helps with moving around the document.
Styles come in two parts: defining the style you want to use for your heading, and defining what that style looks like.
To apply a style to your heading, highlight the heading or put your cursor within the heading then select the heading level you want from the Style pane. Once you’ve done that throughout, then changing the settings for that style will apply the changes automatically to every heading that uses that style – much better than going through and changing all manually!
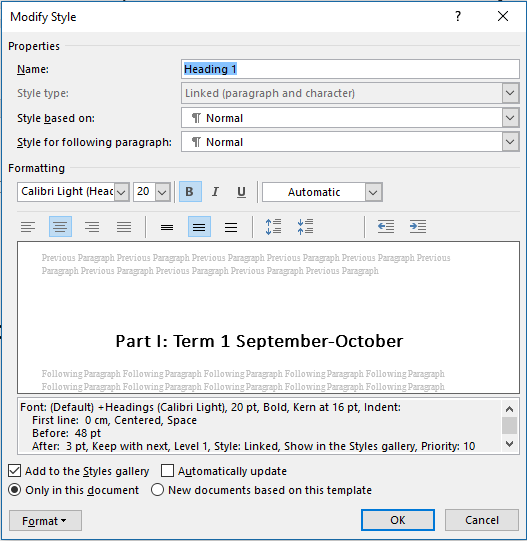
To change the appearance of a style, right-click on it in the Styles panel and choose Modify… Make whatever changes you want, and then confirm those changes.
Alternatively, format one heading to the appearance you want, then right-click on the style in the Styles panel and Update style to match selection. That will both apply the style and set the formatting as you want it.
Think about the look of the headings
When writing those headings, be careful that they’re consistent. It can be easy to switch between words – Three ways to make money – and numerals – The 5 best ways to travel, for example.
Consider cases – do you want ALL CAPITALS or Title Case or Sentence case for your headings? Remember that your typesetter can very easily force all headings into capitals if they’re typed in title or sentence case, but it’s more fiddly to change all capitals into a different case without finding and changing each occurrence. And fancier fonts are very hard to read in all capitals.


