
Assuming that you’ve followed instructions for setting up your manuscript, including using styles and including section breaks before each chapter heading, preparing for a print version is reasonably straightforward.
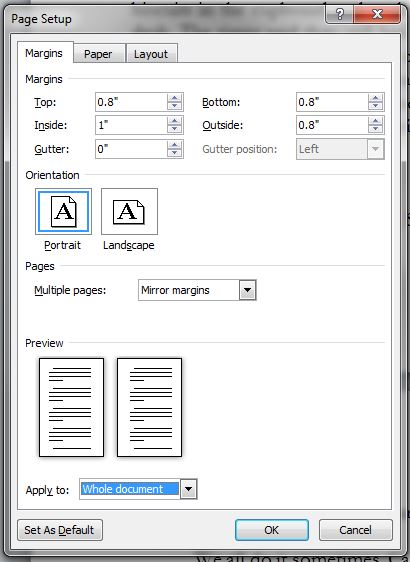
First of all, you must use Page Set Up to set up your page size and margins appropriately, including instructing the file to Mirror Margins on Multiple pages. This enables you to either set up a wider inside margin or a gutter space (which has the same effect as a wider inside margin). This allows for the inside edge of the pages to be bound together. Use your printer’s guidelines in creating your margins, and don’t fall into the trap of trying to cram as much onto each page as possible.
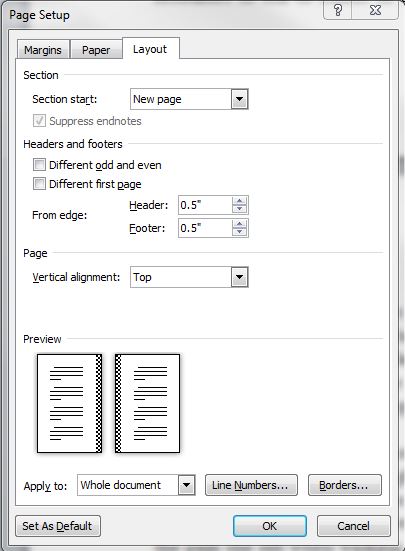
Under the Layout tab, tick the Different odd and even and Different first page options under Headers and footers.
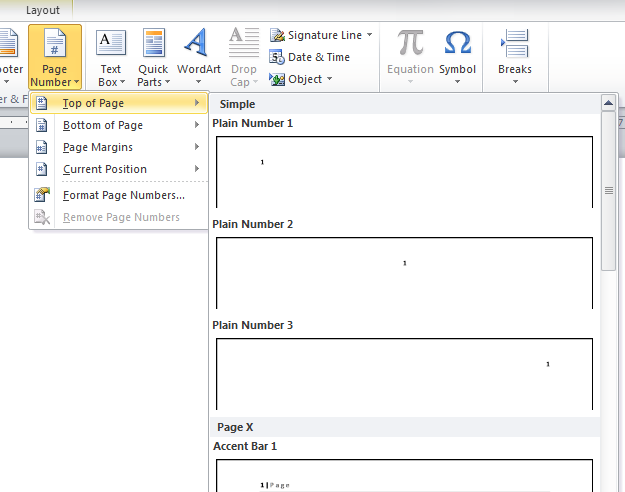
In many books, the header or footer simply contains a page number, and these can be added easily in Word by choosing Insert/Page Number/Top of Page or Bottom of Page, then selecting which position and option you require.
You may wish to have more information in your header, however. For example, many non-fiction books will have the book title on one side of the page and the author name on the other, so while the left and right pages are consistent throughout they do not match each other. Some may even have the book title on one side and the chapter title on the other, so while the book title side remains consistent throughout, the chapter title side changes for each chapter. At the very least, unless you have the page number bottom centre, it should appear on the outside of each page, so swapping from the left to the right. The first page of each chapter will normally have no header at all.
You can access the Headers and footers options by double clicking in the header or footer area of any page, or by clicking on Insert/Header and choosing the Edit header option, and similarly for the footer area.
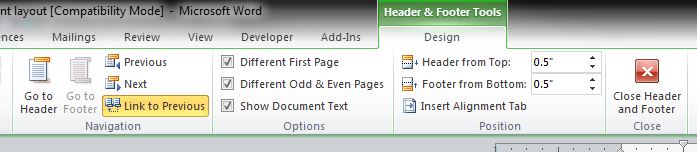
Here, again, make sure that Different First Page and Different Odd & Even Pages are ticked. Different First Page enables you to leave the first page of each section (each new chapter) without a header.
A very important button on this toolbar is the Link to Previous. While this is turned on, the header in the current section (either odd or even) will be the same as the corresponding header in the previous section, so any change you make to this one will affect that as well. If they are all linked, then changing one will change all. This is the setting we want for the header that’s to be the same throughout – for example having the book title on the left hand (even) page.
Unlinking the headers, by turning off that Link to Previous button, means that you can set each header for that side manually. Use the Previous and Next buttons to skip through the sections. This means that you can set up the chapter title to appear on every right hand (odd) page.
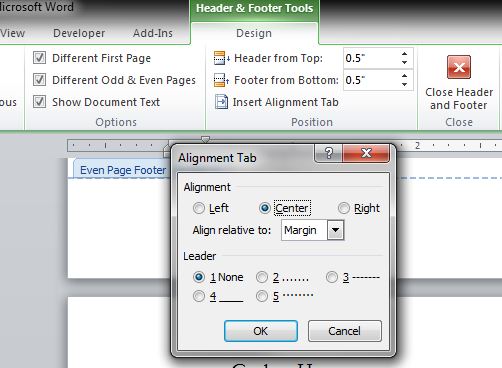
Use alignment tabs to centre the header – on the Header and Footer Tools, select Insert Alignment Tab and choose Center. You will need to add a right alignment tab for the page number when you want it on the right. When putting the number on the left, be careful if your Normal style includes a first line indent – you will need to turn this off for the number or it will appear in the indented position, or apply the non-indented version of Normal.
Page numbers should follow on automatically between sections. You can format their appearance by choosing Header and Footer Tools/Page Number/Format Page Number, should you require a section to be numbered differently, or in a different style. For example, a lengthy preface might be numbered with small Roman numerals, with the actual numbering starting with the text itself.
Check all your headers and footers very carefully (or your proofreader will check them for you) to ensure they are all correct.
Thank you, Lin. Was waiting for this….
You’re welcome! Please let me know if it works okay for you.