
With Nanowrimo almost upon us, many people are trying out Scrivener for the first time, so I’ve put a guide together to help you. Click on any screenshot to see it larger. You can also download a PDF version Getting started in Scrivener if you would rather print the instructions out to have next to you.
First download and install your Scrivener trial – currently the best link is from http://www.literatureandlatte.com/nanowrimo.php – this is a special nanowrimo trial that will last until 7th December.
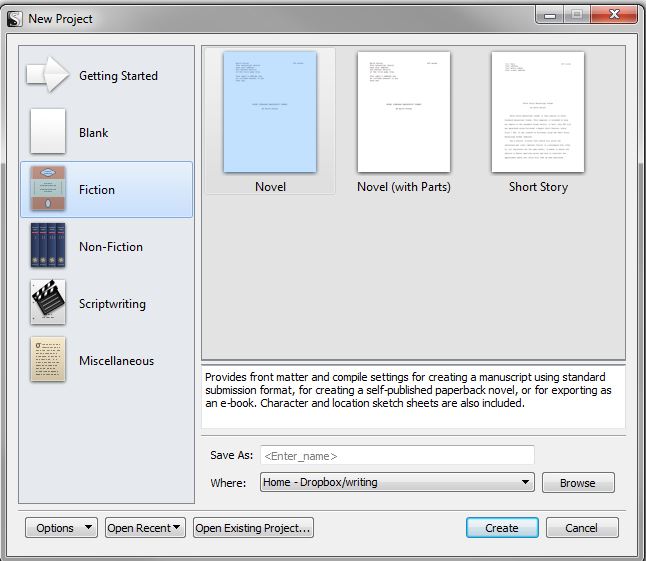 Creating a new project gives you a few options. I would suggest sticking to Fiction for nano if it’s your first time using Scrivener.
Give your file a name and choose where to save it – I always save mine to Dropbox as I can then access it via PC or laptop.
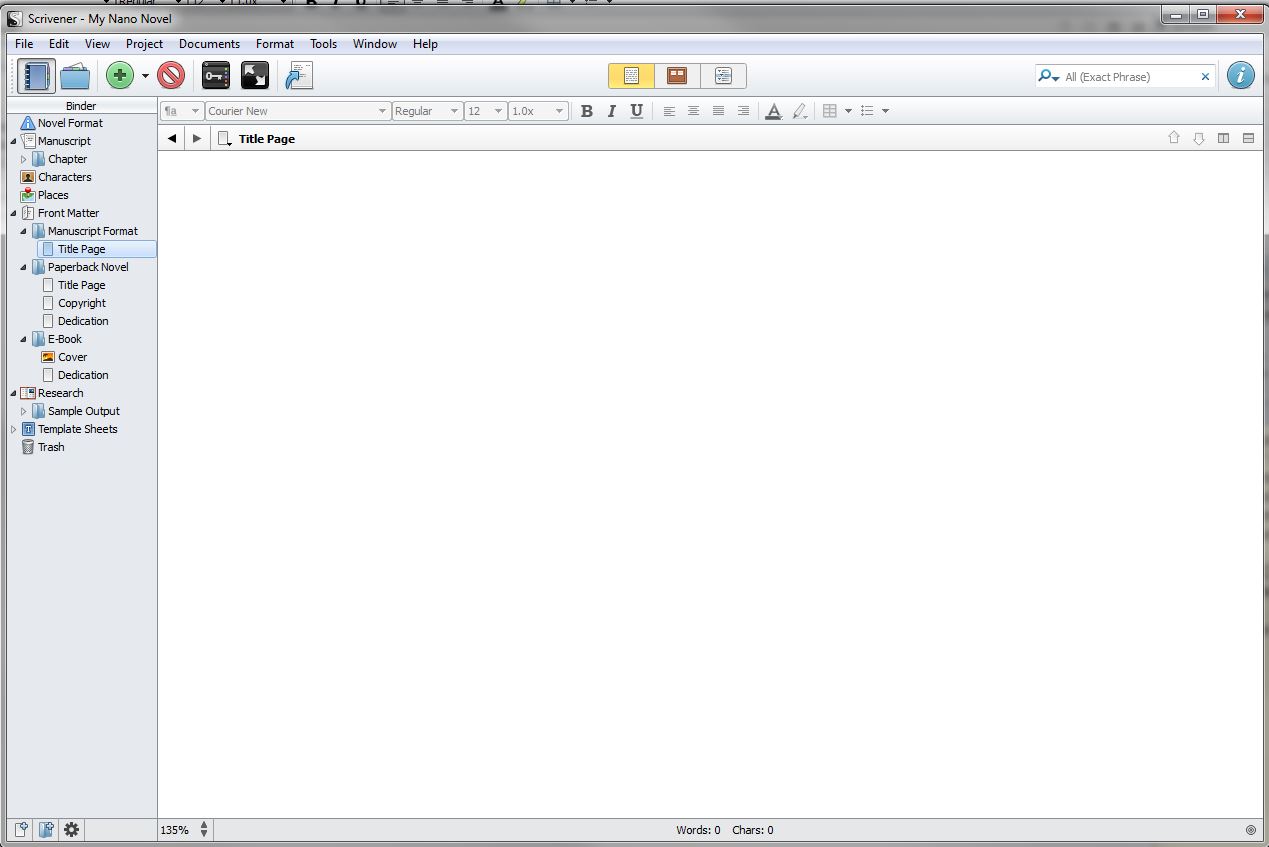
When you click Create, this is what you will be faced with. On the left is the Binder, which organises all your documents. Use the triangles to expand and contract your structure. Typing happens in the main area.
Building your structure
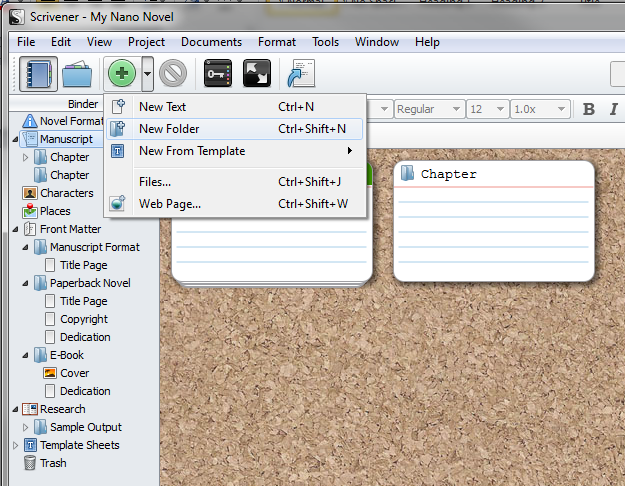 Click on Manuscript in the Binder. Click on the triangle next to the green Add Item button and choose New Folder. There is already one there, called Chapter.
Name your folders as your Chapter titles.
On each folder, click on the green Add Item button (or on the triangle next to it and select New Text) to create a scene in the chapter, and give each scene a name.
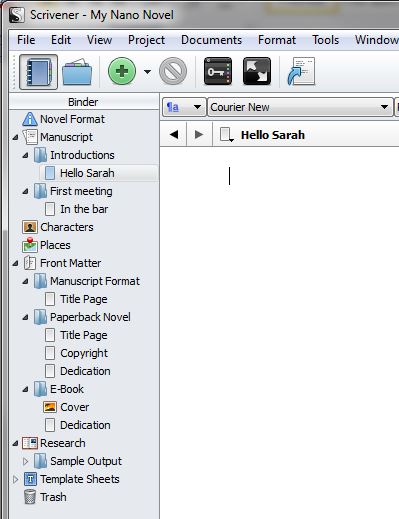 Your organisation can be as complex or simple as you like – here, under Manuscript I have two chapters (folders), each with one scene (text document), but each chapter can contain several scenes. Just add a new one when you need it, via the Add Item button. You can drag and drop folders and files in the Binder to change the organisation.
There is also a folder labelled Research, where you can create and store any documents containing notes rather than actual manuscript. Ignore any other folders for now – just worry about Manuscript and Research.
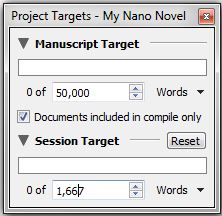 Click on Project/Project Targets and set up your manuscript target as 50,000 and your session target at 1667 (or whatever your daily/session target is). See those bars change colour as you get closer to your target. Scrivener will keep track of your overall word count for the project and each session, whether you work on one scene or split your time between several.
Click on the scene you want to write and get started! Jump between scenes by clicking on the scene name in the Binder. Add a new scene/chapter as you need it or set up your complete structure in advance; the choice is yours.
Don’t worry about saving – Scrivener saves as you go along. If you are switching machines and using Dropbox or other cloud storage, just give your machine enough time to sync between closing Scrivener and shutting the computer down, and between turning the next one on and opening the project.
Using the Inspector
 If you want to make fuller use of Scrivener, I suggest you start with the Inspector.
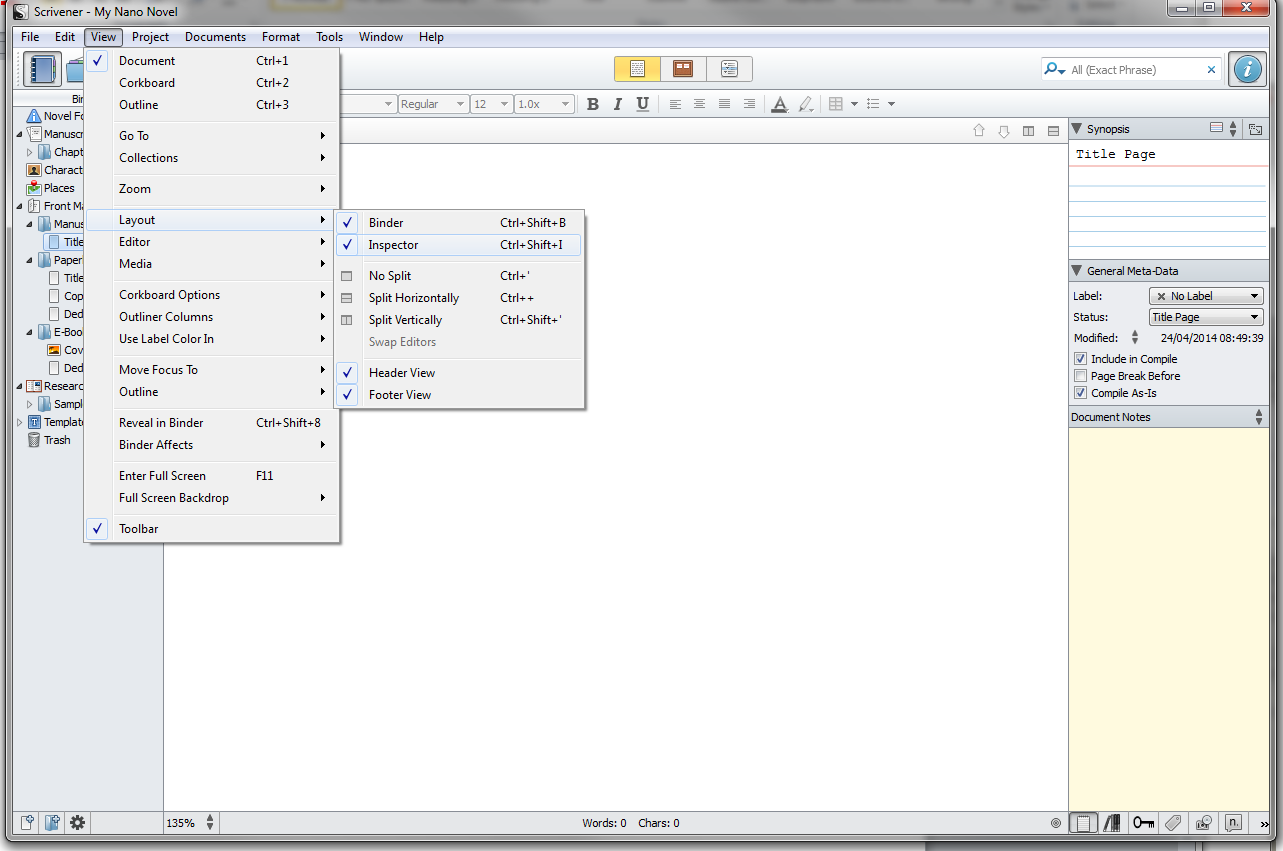
Click on View/Layout/Inspector to turn on the Inspector pane on the right. This gives you options to record information about each section.
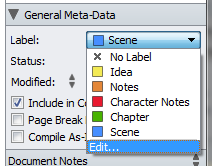
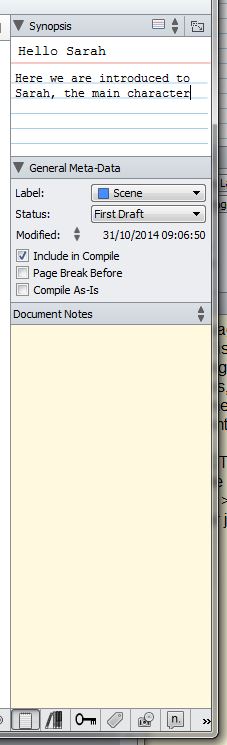 Here I have added a synopsis of the scene. There is meta data that you can play with, to label the type of document (scene, character notes, idea, notes), and a status you can set. You can use the ones already created, or you can create your own by using the Edit button at the bottom of the list of options.
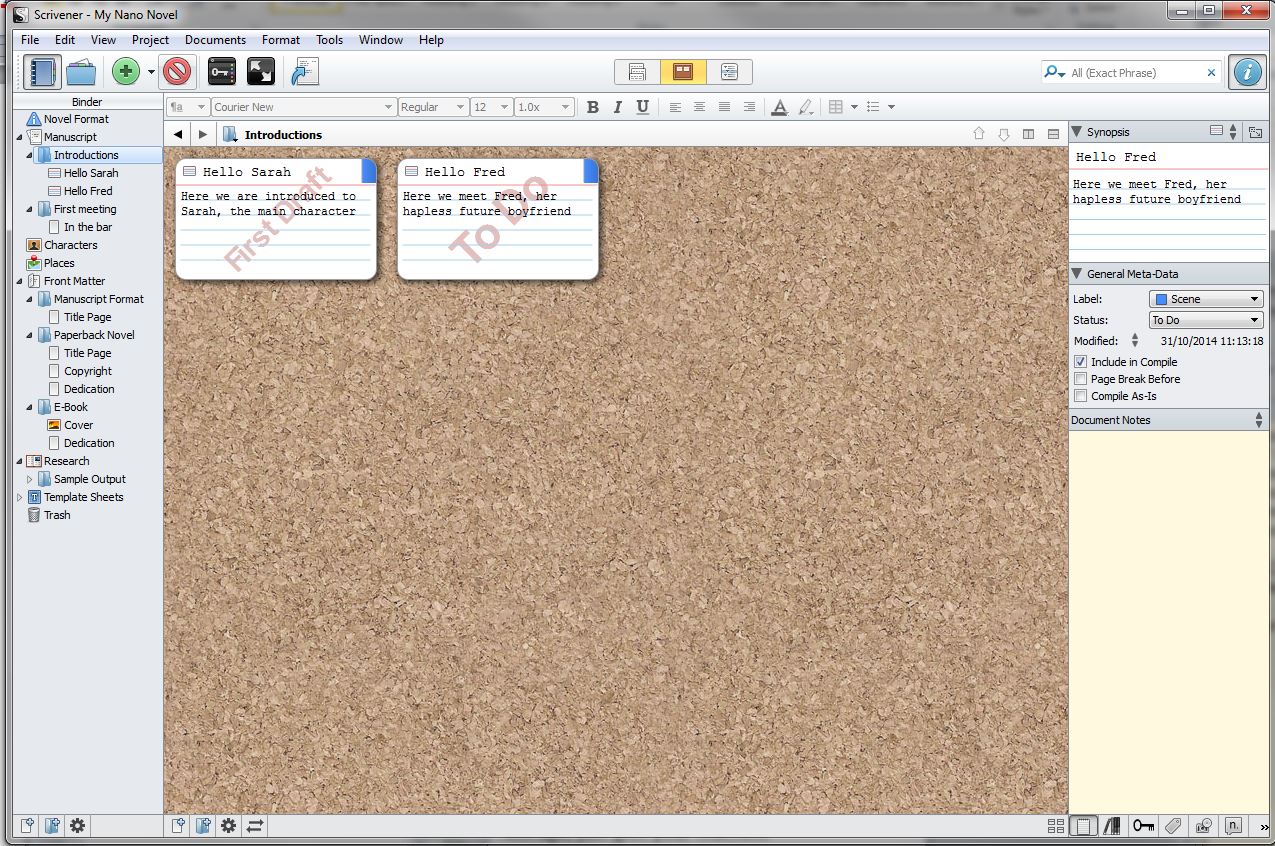
Click on a chapter folder and then Corkboard button on the top middle of the screen to see the synopsis cards. You can drag them around to change their order.
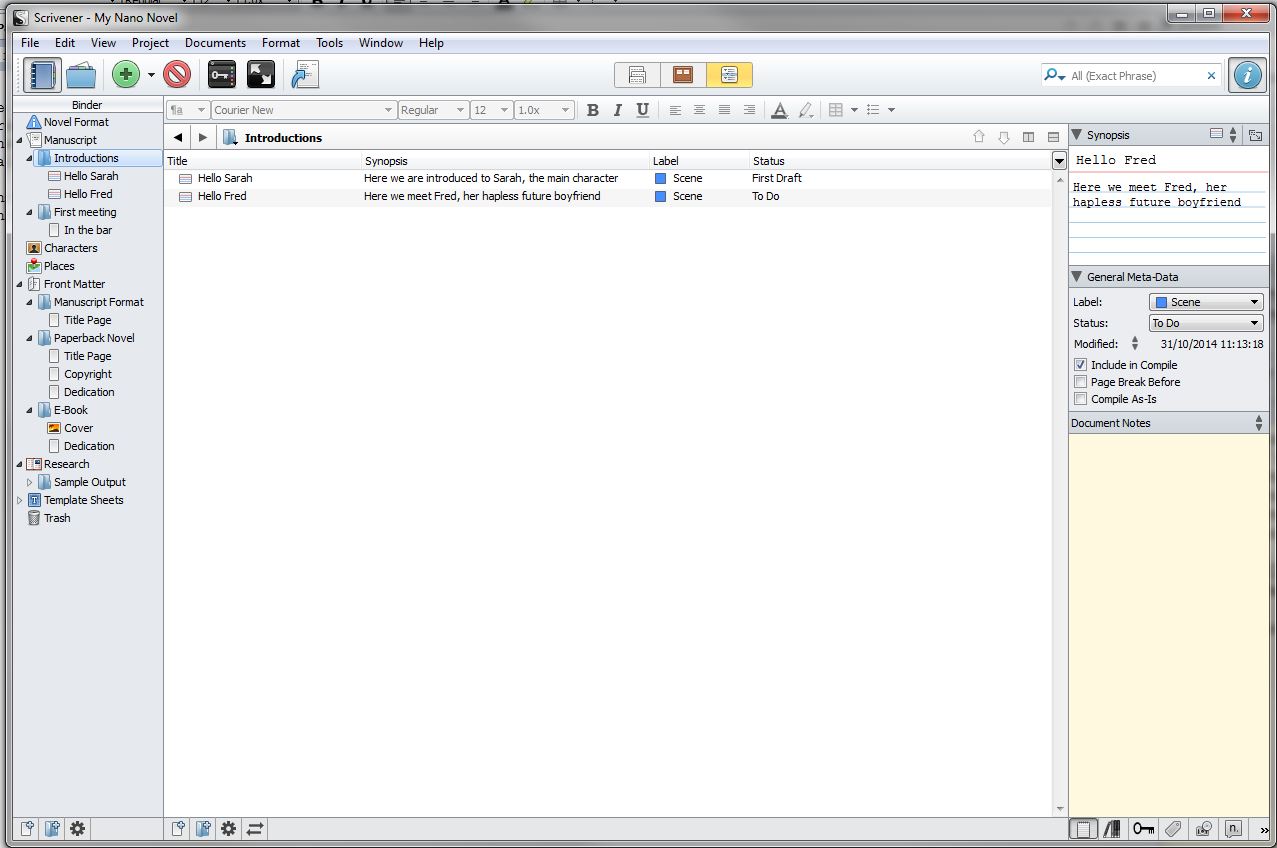 Or click on Outline View to see a different view of your structure. You might have to resize columns so that you can see all of them in the window. You can use Outline View on your Manuscript and expand each chapter, to get an overview of your complete novel, as well as on individual chapters.
Click back on an individual text file to continue working on that file.
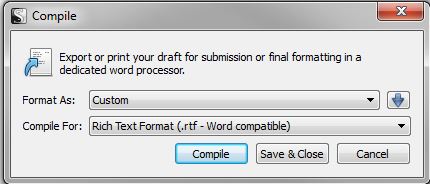 It’s a good idea to compile your project every so often to produce a backup version. Click the Compile button or choose Project/Compile. There are a variety of settings – I usually use these for backups. This produces a straightforward text document that can be read in most word processors.
Most of all, have fun writing!
Brilliant! Thank you so much for doing this. I am determined to get to grips with this software.
You’re welcome, let me know if I can help further. It looks complicated, but once you get going it’s very straightforward for the basics, and you can add extras in as you feel need of them.
I wish this had been published about… 7 years ago! I still only use the basics, but COULD NOT, WOULD NOT write a book (or anything!) without Scrivener. I can not express enough how wonderfully awesome it is to be able to organize my writing, drag and drop scenes, compile for Kindle, and so much else. I’m sure I only use about 10% of the features, but they are the critical 10% percent for me!
Nice guide to get started! I know some friends of mine were contemplating it this year, so I’ll share the link. 😀
Thanks, I hope they find it useful. I too could not imagine tackling a large project without Scrivener.
Excellent post. I’ve just got started with Scrivener and used the NaNoWriMo template that was set up (I didn’t select ‘fiction’ as mentioned here.) This has folders for Manuscript, Characters, etc. plus a daily word count and target set up for Nano. If you click ‘project’ it shows how far into the 50k you are, or how many words to your target each day. Also liked that you can import Word files, so anyone wanting to try Scrivener later in the month could start with Word then switch to Scrivener later.
Interesting – didn’t realise they’d set up their own nano template 🙂